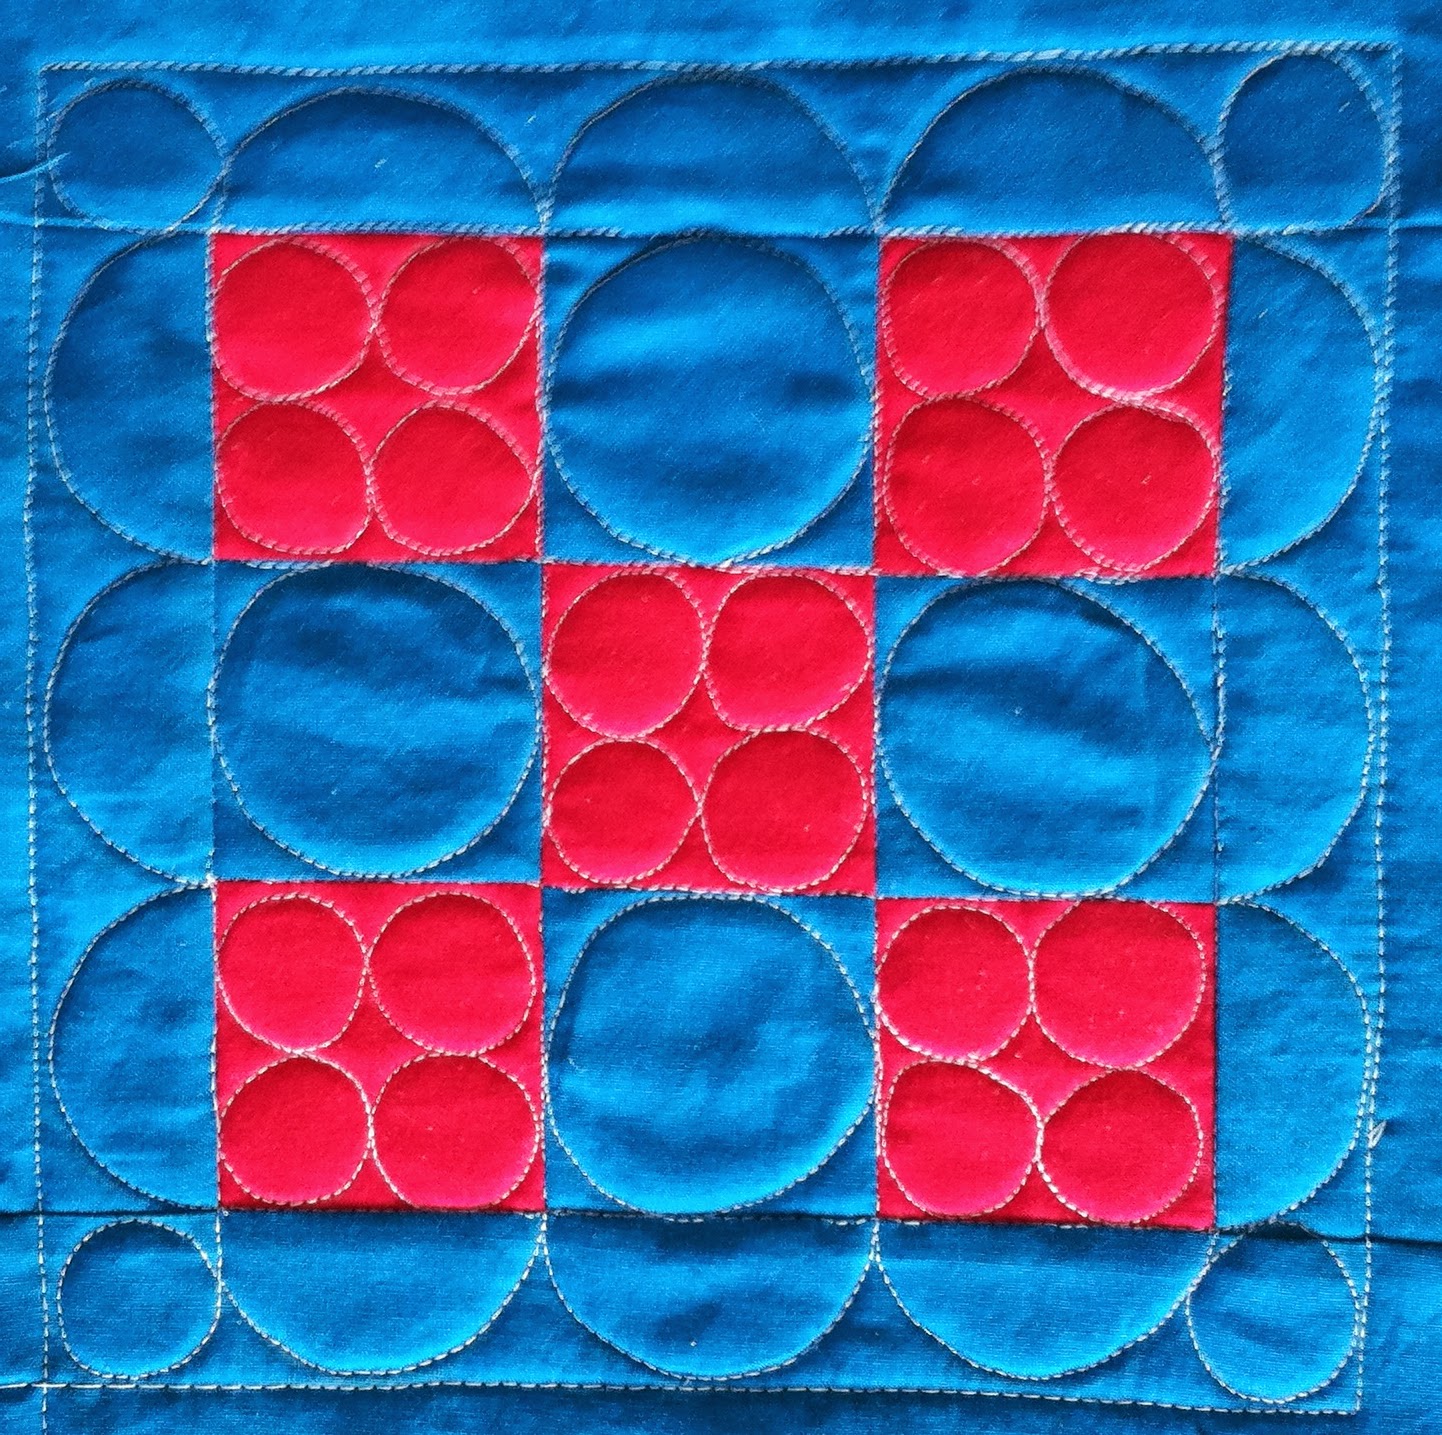
Sunday, May 18, 2014

Building Blocks: Post 3

I'm quickly catching up on this quilt-along, even only being able to sew for a short amount at any one time. (I go in Friday for new x-rays. Hopefully the bone has healed and I can remove the neck brace. And hopefully the neck brace and the weird posture it puts me in is the cause of the pain, and I feel better next weekend!)

It kinda makes me wonder if I am going to stick with 'along', or if I should just go through the blocks at my own pace. The thing is, for a few blocks, I might need the video instruction.

Anyhow- this block was super easy to piece. The outsides are wider than the inside strips because, remember, this gets trimmed to 8" squares before assembly.

As before, I found some of the tracing difficult. It is hard to do long lines because the fabric shifts. And because I am tracing the circles, they aren't that accurate. (Sorry the writing block is rotated. It isn't on my computer then turns when I upload it and I can't turn it back)


 And here is the quilting (I don't get it. Here the writing block is upside down!).  You can see my circles need a lot of work. Writing words is probably the easiest, though tracing is easier to do than free handing them (but that is because my handwriting is awful):


And the back of the blocks. I don't really have any issues with these. I think overall they are pretty good.


Saturday, May 17, 2014

Building Blocks: Post 2

This is the block from February. For these 9 patches I actually used pins, and still my corners weren't too great. These seams are pressed open, and I think maybe nesting seams pressed to the side would help.  I know various quilters have various opinions about what makes more precise piecing.  Leah Day likes open seams, but I'm not sure if that is for piecing reasons or because she finds them easier to quilt (I know she's said that).  All I know is no matter which way I do it, they don't line up well.

All the seam allowances made these ones really hard to trace. I really should have gotten a circle template like we had in engineering school, because my traced circles were not really good, so of course, my quilted circles aren't that great either.

Here are the traced blocks:


And here are the blocks with quilting:


And the back of the blocks.  Really, except the circles not being circular, I'm pretty happy with the quilting.  One thing I'm not too thrilled with is the way the pattern is designed these will get cut down to 8" blocks (about on the edge line of the quilting, though those aren't 100% accurate) so the outside of each pattern gets cut off.  I might cut 1/4" outside that line, so that IT gets covered with the binding strip, but the quilting pattern doesn't.  But I'm not sure.


This would have probably been easier to read if I kept the blocks in the same order for each section. But moving pictures around on blogger is surprisingly hard.  Sorry!

Wednesday, May 14, 2014

Building Blocks: Post 1

I started a new quilt a long. It is with Leah Day (of course!) and designed to take all year. It teaches quilting and piecing skills.  This quilt is marked, which is new to me- everything I've done has been free handed.  I also really need piecing help.

Here's the pattern if you want to join along: http://www.leahday.com/shop/product/building-blocks-download-quilt-pattern/

Because of my injury, I can only quilt for about 30-40 minutes before I'm getting tired, but quilting is actually one of the few things that isn't hurting my neck. The brace actually holds me in just the right position for quilting, so I'm not hunching like I normally do! When I get it off, maybe I need to throw it into the sewing room :)

But I've been able to work a little at a time and get things done.

Here are the blocks pieced and marked for quilting.  Things start very simple, but since only 2 of the 3 have a real sharp point in the middle of the piecing, I needed simple!
For these blocks, I used a flashlight under a glass table to trace.  I'm using a chalk pencil to mark, and I think I might need something with a finer line for future designs, especially as they get more complicated, it is hard to mark accurately.


And here are the backs of the blocks.  I'm very happy with my stitch length, good and consistent.  The block with all the straight lines has some pretty bad build up where I had to travel stitch in the ditch. Ditches are my nemesis, and straight lines aren't exactly my favorite...


And finally- what the blocks look like on the front.  For ease of quilting, the blocks are pieced as 10" squares, but they will be cut down to 8" squares when they are pieced together.  A little wasteful, but having something to hold onto, as well as quilting on a small square instead of a large quilt really facilitates learning to quilt!


Sunday, April 20, 2014

Eagle Quilt

I took a class last weekend on surface design- using thickened dyes to paint on fabric. (Confusing to call it painting- because it is definitely dyeing, not painting...)

Anyhow- I "invented" (someone has probably done it before me) a technique to make a variegated


line. I took a squeeze bottle and stacked yellow and red, so it would squeeze out yellow, red, and shades of orange.  Then I drew a stippled  line all over a piece of fabric.
When I got home I had this idea to stipple all the white space. Following the curve of the line I stippled about 75% of the quilt, all but inside one big blog near the bottom. I thought it would look cool to pebble that- if you look closely you can see the change of texture.

This was my idea for a finished project, but it didn't look like anything.

So I thought I should overdye it.  I overdyed in a light orange dye bath.  Now you can see the white quilting lines better, but it still didn't look like anything.

I had the idea to make it into a sunset. I went through Kevin's animal photographs (I wanted a giraffe, but couldn't find just the right one) and found a gorgeous eagle sitting on branches, and went to work in photoshop tracing it as a silhoutte.

I used freezer paper to cut it out of fabric backed with fusible, and fused my eagle onto the quilt. It is just fused, not stitched, so super easy raw edge applique. My freezer paper didn't want to stay attached, so cutting the fine detail was a bit tough.

It still needs binding, but I am so happy that my sunset silhouette turned out nicely!

Saturday, April 12, 2014

Sorry- it has been a really long time.

I can't even remember the last time I blogged...
Is anyone still out there?

Since it has been so long, you'd think I have tons of projects to share- but mostly, I've just been doing machine embroidery. Christmas shirts, birthday presents, and I've started tackling onesies.  Not for me!

The first onesies I made are for one of my childhood best friends, who is expecting her third child and first girl. I made 4 for her- but only have a photo of 3, oops
 
There is a bit of a baby boom going on in our neighborhood and later this summer we are having a baby shower for 5 neighbors together! (Another neighbor just had her baby, and she got a personalized onesie, the same flip flop design as above, since 1) I knew that baby's name and 2) I didn't have this design yet.)
But for the 5 new Moms, I made onesies that celebrate out neighborhood.  My neighborhood is the best!

I also made 3 onesies for my first college roommate. But all three are for her! Her triplets are celebrating their first birthday next month.
The 3 month size is the smallest I'll embroider- they are still really tough, and I've had a few mishaps where the needle has caught extra fabric and caused a giant mess; but these are much easier than I thought they would be. I had always heard onesies are really really hard!

I'll try to share more of my projects soon.


Sunday, November 24, 2013

It needs a quilt.

When you're a quilter, one of the most fabulous things is taking just a ton of fabric and making it into something useful and beautiful.

So what can a quilter's husband do to one up her, but stay on theme?  Take a ton of wood and make it into something useful and beautiful.
Yep- Kevin made a bed.  Another one. 
I mean, previously, I made a twin size quilt, and then he made a twin sized bed.
Well this time- he beat me. He made us a king size bed.

An absolutely BEAUTIFUL one.  It's my dream bed.  I just love the dark stain and the six storage drawers.

My husband is so awesome.  So I guess I really need to get working on a quilt.


Tuesday, November 12, 2013

Zen Doodles Workshop

I am a member of the Old Capital Quilt guild, and each month the guild brings in a speaker and a workshop. These workshops always take place during the week, so I am generally unable to participate due to work.  This month the instructor was Laura Wasilowski.  I think I've professed a love for her artwork on my blog before- without a doubt, I knew I had to take her class.
She spoke last night at the guild- about making serial quilts. The same thing, and doing it a lot.  Lots of artists work in series, but I loved her reason why "then you don't need a new idea for a long time!"  Her talk was filled with incredible humor, and funny songs.

Today's workshop was on Zen Doodle quilts. I had taken her Craftsy class (hey, it's on sale this week)  so I was a little wary going into it (due to a bad experience with a Des Moines AQS workshop, my rule was to never take a class where I knew something about the subject: that was an advanced free motion class where we spent the whole time stippling and doing basic meanders, what a waste of money)- but I am SO glad I did it.  I'm not sure I really learned anything new exactly, but the class really got my creative juices flowing and I love the project I made.

The class kit included about a 1/2 yard of a dark rainbow colorway and 1/4 yard of a pastel (full length of the yardage- but 1/2 and 1/4 WOF).  We were also given a few strings of embroidery thread so we can embellish when we got home.

After going over some basic rules of fusing, we were given some time to doodle. We were told to make 12 doodles, but I only took a picture of 6.
Then, we took our favorite doodle and made it a large pattern.
Then, we made the pattern into fabric!
One of the things we did was embellish the fabric pieces with other fabric. The zig zag pieces on the triangles are not patterned fabric- they are separate cut out fabric pieces. 

This took a long time.  The  light purple triangles inside the dark blue triangles are also all cut out.  Lots of tiny pieces, all fused in place.
As is typical with my art projects (teachers hated me for this), I finished early. I was able to put a border on my quilt and call it done. 
Now I just have to decide if I want to add hand embroidery (I'm not sure- I can't think of what to do with it) and also to quilt it (also need how to do this).  I also need to figure out a binding. I don't have any of the kit fabric left in the dark colors, and I think the light wouldn't look great for binding.  Maybe I'll just do black. 

It was a FABULOUS day. Wish I was retired and could do more of the workshops.

Thursday, October 31, 2013

Thread Reviews, #2

I have more thread reviews today. I have to apologize. I picked pretty colors for the photos that 1) I thought would go together and 2) that were new spools so you could see relative size, and then I realized the light pink and light purple wouldn't show up well on my test fabric.

Here are today's spools.  This includes two threads that I use A LOT: Essential and Isacord.  I have tons and tons of both of these threads, they are my 'tried and true's.  These samples were made in the same manner as the last, but I think I had Bottom Line in the bottom.

Connecting Threads Essential, Isacord, MetroEmb Sigma

 Onto the reviews:
Thread Name: Essential

Brand: Connecting Threads
Yardage: 1200 yards
Material: 100% long staple cotton
Where did I buy it: http://www.connectingthreads.com
Cost: $2.79 per spool, free shipping with $50 order. They are often on sale for even less, or available in discounted sets.
Cost per yard: 0.2325¢
Overall Impressions: A great bargain thread. Matte finish.
Pros: 
1) Runs nicely through the machine.
2) Comes in tons of colors 
3) Inexpensive and easily available, with free shipping
4) Nice for piecing where I don't like to use poly.
Cons: 
1) Thick.  It says it is a 50 wt, but it is SO much heavier than anything that size.  Not good for much travel stitching (those thick lines in the sample are traveling ONCE) or micro-quilting.
2) Occasionally I will get breakage. I had one color that broke 5 times in an hour of quilting.
3) Can be linty.  Just clean your machine every bobbin.
Will I buy it again: Yes.  This is an affordable thread and I love to use it for quick stippling on a charity quilt.  I match the bobbin thread to my top thread and it always looks great. I also use it for most of my piecing. 


Thread Name: Metro (the purple in the design)

Brand: Metro Embroidery
Yardage: 1000 meters
Material: 100% polyester
Where did I buy it: http://www.metroemb.com/store/

Cost: $0.89 + $0.89 shipping (Shipping was $1.78 for two spools)
Cost per meter: 0.178¢
Overall Impressions: For such an inexpensive thread, it performed pretty well.  Kind of in-between shiny and matte.
Pros: 
1) Super fast shipping. I ordered on Wednesday and got it on Friday. 
2) Incredible price. One of the least expensive threads I've ever seen.
3) Available in big (1000 m) or bigger (5000 m) spools.
 Cons: 
1) Wasn't the smoothest thread, but a HUGE improvement over the metro.
2) Made in China
Will I buy it again: Probably not. I just like other options more, and even though this is so much cheaper, I think it is worth spending the money for something better.

Thread Name: Isacord

Brand: I don't know, I've only ever seen it called Isacord.
Yardage: 1000 meters
Material: 100% polyester
Where did I buy it: https://www.imachinegroup.com

Cost: $3.45; shipping I paid $7.48 for 10 spools; $4.20 total
Cost per meter: 0.42¢

Overall Impressions: This is a wonderful thread. It was my favorite up until recently and now I think it is a tie (you'll read the others in the next review).  Fabulous for fine detail quilting.
Pros: 
1) Thin thread, wonderful for travel stitching and micro-quilting
2) Runs great through my machine.
3) Available in big (1000 m) or bigger (5000 m) spools.
4) Inexpensive, readily available (including semi-locally for me, but more expensive)
 Cons: 
1) ?????
Will I buy it again: Yes. And I'll use the huge number of spools I already have. I love this thread. But, I decided on a different one for the Play With Color quilt.

Sunday, October 27, 2013

Thread Reviews

I am looking for a thread to use for the Play with Color quilt.  I usually use Isacord, but thought it might be neat to try something new.  So, I found a bunch of other threads and bought/requested samples.  I figured, if I'm stitching out samples of all those threads, why not stitch out samples of other threads I have too.  So the next few days, I'm going to do a bunch of thread reviews.

My husband did some pictures for me, and he grouped them by color, so that's how I'll review them.

Metro Embroidery Metro
Sulky Rayon
Sulky Holoshimmer
Mettler Polysheen
For all samples I used my Bernina 430, freshly cleaned and oiled, with upper tension set at 2 and a 80/12 Universal needle, Seralene in the bobbin, unless otherwise noted.


Test Design Name: Spaghetti and Meatballs
Thread Name: Metro (the green/blue in the design)

Brand: Metro Embroidery
Yardage: 1000 meters
Material: 100% polyester
Where did I buy it: http://www.metroemb.com/store/

Cost: $0.89 + $0.89 shipping (Shipping was $1.78 for two spools)
Cost per yard: 0.178¢
Overall Impressions: My machine hated it.  The sample 5" square wasn't even completed I was worried I would break my machine it was clunking so bad.  It was horrible.  I had done multiple samples at this point with Seraline in the bobbin. I changed it to Isacord, didn't work, wound a bobbin to use the same thread (like I usually do on quilts) and it didn't work.  I adjusted the top tension looser and tighter; still horrible noises and horrible stitches. I rethread top and bottom. I even re-cleaned and oiled the newly prepped machine.  This thread was NOT working for me.  If you enlarge the sample, you can see the bottom right has horrible tension problems with the white thread (which is insanely thin) masking the color, and even after many tries at fixing it the top right has blue Isacord dots. There was also terrible eyelashes on the back, which I haven't gotten in forever with any thread.  The design is very choppy because the thread stitched so unevenly it was hard to control.
Pros: 
1) Super fast shipping. I ordered on Wednesday and got it on Friday. 
2) Incredible price. One of the least expensive threads I've ever seen.
3) Beautiful on the spool, incredible shine.
4) Available in big (1000 m) or bigger (5000 m) spools.
Cons: 
1) My machine hated it. I thought I was going to have to take it in for repairs it sounded so bad (but it recovered with a new thread.)
2) Could never get tension right.
3) Skipped stitches
4) Made in China
Will I buy it again: NEVER.  Probably won't even use it.  I really wanted to like this one because of the low cost, it would be great for Play In Color, but it was awful.


Test Design Name: Freehand feather
Thread Name: Rayon

Brand: Sulky
Yardage:  250 yards
Material: 100% rayon
Where did I buy it: Joanns
Cost: $4.99 (I don't know, but I'm sure I used a 50% off coupon, that's the only time I buy thread there.)
Cost per yard: 2¢ (1¢)

Overall Impressions: Shiny, but not for me.  I found it difficult to work with, my machine didn't purr nicely (though what I thought was 'bad' was nothing compared to when I got to the Metro thread- I used this one first)
Pros: 1) Available locally
2) Lovely sheen.
3) Thread didn't build up too badly with travel stitching
Cons:1) Didn't run smoothly in my machine
2) Skipped stitches
3) Expensive-ish
4) Small spool size
Will I buy it again: No, but I might use what I have.


Thread Name:Holoshimmer
Brand: Sulky
Yardage: 250 yards
Material: Polyester Film
Where did I buy it: Joanns
Cost: $4.99 (I used a 50% off coupon)
Cost per yard: 2¢ (1¢)
Test Design Name: Giant Snail

Overall Impressions: This stitched out much smoother than I thought it would. And I LOVE how much sparkle it has. I was pleasantly surprised.
Pros:1) Super sparkly
Cons:
1) A few skipped stitches
2) Very specific, can't use this a lot.
3) Expensive-ish
4) Small spool size.
Will I buy it again: If the project calls for it, yes.


Test Design Name: Amazing Daisies
Thread Name:Polysheen
Brand: Mettler
Yardage: 220 yards (200 meters)
Material: 100% Polyester
Where did I buy it: It came with my machine. (Available at Fabric.com)
Cost: Free for me; $2.28 at Fabric.com
Cost per yard: 1.04¢

Overall Impressions: No complaints here.
Pros:
1) Lovely sheen
2) Very nice stitch out
3) The threadplay on travel stitches looks great
4) Ran through my machine really nicely.
Cons:
1) Not enough yardage on the spool.
2) A bit expensive for poly.
Will I use it again: Yes, when I know that I only need a small amount of one color.  I won't use this for my Play in Color quilt.

Thread, close up.

Ever wonder what the thread looks like magnified?  Kevin took some pictures for me with his macro lens.  I had wanted them to compare size, but realized without everything in one picture with a reference size, it wouldn't really show much.  However, the are still really cool, so I want to share.
Connecting Threads Essential, Isacord, MetroEmbroidery Sigma

MetroEmbroidery Metro, Sulky Rayon, Sulky Holoshimmer, Mettler Polysheen

Coats and Clark Dual Duty, YLI 100% Cotton Variagated, Superior Bottom Line

Same as above, with Dual Duty in focus.