Sunday, February 17, 2013

UFO Sunday

So, I am still basking in the glory of having finished Winter Wonderland.  I have photos of it taken and am getting CDs ready to send to see if it will get juried into a show...  I don't think it will, but this is the first quilt I've ever made that makes me think I really ought to try.

This weekend, I did the sashing on the Mario quilt, and now the top is all finished up.  Don't look too closely- there are lots of mistakes!  It will be awhile before I quilt it.  For two reasons: first the gajillion seams every inch really scare me, it is going to be a pain to quilt; second the sashing isn't perfect (this is why I never sash!) and it bubbles up a bit.  I think that I should be able to handle that though.  Third: I need to find backing fabric.  I would like to use video game fabric, but the only one I've found so far is Pac Man, and my husband vetoed that.  A friend in Korea is going to look for Mario for me, but otherwise, I will probably just use a solid or marbled fabric.

I also started quilting the words onto Express Your Love.  I've got to say, at least close up - it isn't too pretty.  I'm not going to do any of the other 'ribbons' until Leah demos some other methods (she says she plans too...)

I've also started designing another art quilt.  Our guild challenge is art quilts, so this will take priority over EYL, as I need to have it done I think by June.  I'll post about that as time goes on.

Sunday, February 10, 2013

FINISHED Object Alert

Yes! You saw it right here: The snowflake quilt, Winter Wonderland, is DONE.

The quilt as you go was not easy, because I really wanted it perfect.  It isn't perfect, but I think it looks great.  I did the binding by machine, but incredibly carefully- I pinned and pressed each step of the way, and I took 8 attempts to get the 'seamless' (diagonal seam) finish to the binding so you don't know where I started applying it (I usually just go straight across and it isn't very pretty.)  My corners look pretty good, if I do say so myself.   I took all this care because I really want to try to send this quilt to the state fair, and possibly other shows.  I know the quilt isn't good enough to win shows, but after the AQS judge came to our guild meeting I have a thought that maybe it is good enough to get into a show? (And of course, the state fair is open).

Anyhow- want to see a beautiful quilt?  AAAAGHHH!  So excited!


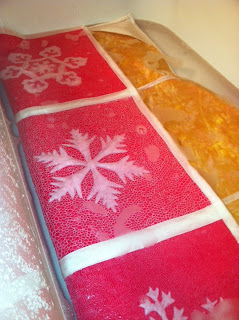
Where is the quilt right now?  In the bathtub....  There is A LOT of starch in this thing, plus I think some water soluble thread is still hanging out from the initial step, and I don't want buggies eating it.   You can see here how bright the pink fabric I used was. The organza really pales it out, not to mention the mounds of white thread.

And of course, label your quilts.  I put a little message on this quilt to remember the stage of quilting I was in when I made it. Really, I was a beginner.  I took my very first free motion stitch just a year before I made this quilt, and I certainly didn't spend the entire year quilting!  This quilt was me saying "you know what, I'm going to get good at this!"  And doing all these designs and all this quilting- I think I can say pretty firmly now: "I'm good at this."


I want to thank Leah for the fabulous pattern, and the 365 project which inspired me to do this (and where I got a good number of the designs from.)


Posts about this quilt:
Starting the quilt
First steps

Snowflake 1, 2, and 3
Snowflake 4 and 5
Snowflake 6
Snowflake 7
Snowflake 8
Snowflake 9
Snowflake 10 and 11
Snowflake 12
Large Snowflake
Beginning Assembly

Sunday, February 3, 2013

The end is near!

Today I spent pretty much the entire day quilting.  I finished stippling the outside of the center (large) square.  I did some pebbling, some spirals, and some lines to fill the rest of the middle of the snowflake.  And magically- all the quilting was done!

Up next was assembly, after a few false starts (sewing the strips to the wrong sides) I had the blocks all assembled.  Um, this quilt is big.  I've laid it all out before, but for some reason I kept thinking it would shrink once it was put together.  Nope- big, big quilt.  I'm not sure where it will go in the house, maybe it will have to go into my office.
I started putting the sashing on the front.  I tried to do the wavy sashing, but I couldn't figure out how to make it curve- I even made sure to cut bias binding, but I kept getting ugly wrinkles, so mine is just going to be square.  I need to sew together the LONG strips now- they will have to be seamed, although, since I'm not doing waves, maybe I can cut on the cross grain and do a 55 inch long strip?  I don't know if that is the best use of fabric, the seams aren't generally that visible.
I'm also trying to decide if I want to do some decorative stitching down the middle of the strips- I think it will give them a bit more weight and prevent the quilt from folding along the strips.  I could do it in white and it would be pretty much invisible, only seen by someone who admires it really closely, or I could do it in pink and pull the color out from the blocks (but then my stitching needs to be perfectly straight...)   I only have a 5 mm machine, this is something that would be really great with a 9 mm.


Before I can do the binding, I need to make a label on my embroidery machine and get it onto the back of the quilt.  I also need to decide if I think corner triangles will support the weight or if I have to do a proper hanging sleeve. The problem is- those require hand sewing, and I can't do that!

But OMG! the quilting is done!  I took this project on with just about a year of experience under my belt, to prove to myself that I could quilt.  And you know what- I can quilt!  (I'm thinking about entering it in the state fair this summer.  It isn't show quilt perfect, but I think it is pretty darn awesome (though once I get the binding on, that may not be true anymore, I suck at binding...)

Sunday, January 27, 2013

Quilting update

Sunday is dedicated to finishing up long lasting projects. I did a bunch of this:
Which means I got a good chunk of the large snowflake done.
I also prewashed the white fabric that will be the sashing!


MLK Day I finished sewing all the Mario Squares and all week long I've been pressing them.  Today, Kevin layed them out how he wants the quilt.  I need to cut sashing and assemble now.  I'm pretty excited about this one!

 (Sorry, no idea why that loads sideways.  It looks right until I submit.)

Sunday, January 13, 2013

Making Progress

In addition to the snowflake quilt, I have two other projects going on: Express Your Love and the Super Mario Quilt.

This weekend, I made progress on both.

For Super Mario, I found the painter's tape, so I can cover the bed of my machine and prevent any more Sharpie marker lines from forming as the interfacing rubs over the bed of the machine.  I also pressed the two blocks I had finished.

Neither of the blocks are 18.5" square.  Sadly, the place squares on a grid and sew method does not ensure perfection.  But I still think the shapes match up a heck of a lot better than if I was trying to do this through normal piecing methods!   I also think that having the lines for all the individual squares makes the pixelated pictures look more authentic, and if I pieced them individually, I would have definetly done larger "chunks"- not cut every single block. So I'm still glad I did it the way I did, even if it still isn't perfect. 


For Express Your Love, I did all the outlining, except the hair- I'm still not sure what color to do that in.
 I also quilted the Green part of the Earth.  I don't like it, but it is staying.  I echoed the outer part of the earth, and I should have taken the line inside and echoed the shape of the water- oops.  I also didn't use Isacord (didn't have green) and selected the closest match I had, which was Dual Duty.  The thread is not pretty (neither is the picture, sorry).  It is dull looking and thick.
Not sure how to do the water.  I'm thinking about pebbling for a bubbles look, but I'm going to wait to see what Leah shows us.

I've decided on a few of the phrases I'm going to put into the ribbons (or at least pick from), but am a bit scared of getting them there, because my handwriting is terrible, and I need to mark the words to fit the ribbons.

"Live in the now and design your future."
"Let your dreams fly free."
"Have an open and willing heart"
Live life courageously"
"Release all fear of failure"
"The future is bright and happy"
"Surround yourself with love"

The end is near!

Today I decided to really make a focus on my snowflake quilt.  It isn't snowy at all this winter, and at the pace I'm going it will be summer before this is display ready.

But I did get the 12th and final small snowflake done.  The design I did is inspired by Leah Day's Circuit Board, but I'm not sure whether or not it is that.  The organza is very shiny in the photo, so I'm not sure how well you can see it.  To me, it is like a medatative labrythith that you walk for reflection- not a maze, but a single line that has a start and end point (although since I trimmed the sides, it doesn't really work.)  If you knew where I started, you could trace your finger over the entire design.   You should be able to click and enlarge the design.

So how much left until the snowflake quilt is done?  I need to put in the giant middle block!  I am not entirely sure whether I want to stipple or do McTavishing.  I am leaning towards stipple.  My McTavishing isn't bad, but I always think it looks better in matching thread colors, rather than this big contrast of the white and pink.  But after all the hard work of this quilt- will people look at the big block being stippling as a cop-out, using an easy stitch?  At this point, do I care?


Wednesday, January 9, 2013

Work In Progress Wednesday

I have a few things in progress right now- I need to stop starting new things!

So here are my updates:

Mario Quilt: 1 block finished (Boo), 2 blocks finished seam but need final pressing (pressing those final seams is a pain in the butt!), 3 blocks have horizontal seams sewn, 6 blocks are fused with no sewing yet.

I need to find some painter's tape to put on my machine.  It is developing two faint red lines from the permanent marker I used to mark the grids on the fusible interfacing (I did the backside wanting to keep it off the fabric, I really didn't think it would rub off onto the machine!!!)  Kevin tells me it is only cosmetic and won't hurt the machine- but my Bernie is only a year old, I don't want her messed up (despite the few scratches I've managed in that year.)

Express Your Love:  This is the quilt pictured above, and is a quilt along done with Leah Day.  I finished piecing my top and she is laid out on the batting and backing and needs to be basted.  I've selected phrases to go on the quilt- a little different from the ones suggested by the quilt a long.  To me, the idea of a goddess quilt is really personal, and it seems odd to copy someone else's.  So rather than thread painting affirmations I would say to or about myself, I am instead going to write positive thoughts that someone watching over you would say to you- the thoughts the Goddess is blowing down to Earth for us all.  Oddly, the first thing on my list was "Have an open and willing heart" was the first thing I wrote down- and that was a suggested phrase this week (except as "I have an open and willing heart") so there will be a lot of similarities.

The next step is to outline quilt the sections.  I need to decide if I want to do them all in white, or do them in the color of the section.  I might end up doing the hair in a dark color but everything else white, but since I plan to use color thread in the background, I'm not sure how white dividers will work.

It is a fused quilt- so all the pieces shown are fully fused down to the fabric, with quarter inch overlaps when they join another piece of fabric.  I used freezer paper to trace the sections and get all my positioning right.

 If you are following the quilt-a-long, you will notice the background rays are missing.  I drew them in with marking pen and plan to use yellow and orange threads to fill the alternating sections- that way it appears like the suns rays radiating out behind the Earth.

Snowflake:  This might be entering WIP territory again.  I keep putting it off for other things.  I need to do the final small square and the large square.  But then there is the whole "put quilt together" thing.  And that is going to take a while. Even longer still because the white used in the Mario quilt and the background for Express You Love was supposed to go on this quilt, so now I don't have the fabric- haha.

(I can't get the button to load- but join the link up party at http://www.freshlypieced.com/)

Wednesday, January 2, 2013

Work In Progress Wednesday


One of my goals for the new year is to blog a bit more.  Since I rarely blogged last year, hopefully I can meet it.   One thing I am going to try to do is update WIP Wednesday.  It is a really big link up party, so I'm not sure many people will visit my blog from it (since I'll have to blog at the end of the day) but it is a fun way to find other people's blogs- so I am looking forward to finding them.
Today the reason I can post right now is I am skipping Sh'Bam (my wednesday workout).  I did something to my feet and it hurts to walk.  It is like I have blisters on the bottom of my left foot toe and on the top of my right foot toe, but they aren't blisters.  Web searching leads me to believe I may have frost nip or Chilblains (except it doesn't itch).  Hopefully whatever it is, it goes away soon.  It has gotten gradually worse over the past week- which is one of the reasons these blocks are WIPS, not finished.  I couldn't stand long enough to work on them New Years Day, and had to stop.
So these blocks have all had their horizontal seams sewn, but not the vertical ones yet.

I also started Leah Day's "Express Your Love" quilt.  I am going to do raw edge fusing to put it together. Assuming I have enough fabric for it- I can't buy anymore!  It is a much bigger quilt than I thought it would be!

The other WIP is the Snowflake quilt, no further progress has been made on that one.

And I just took Laura Wasislowski's Craftsy class- and it was amazing and now I want to make a bunch of fused quilts!


WIP Wednesday


Monday, December 31, 2012

Year in Review

Everyone else is posting a year in review, so I thought I'd do the same.  Or at least a review of stuff I blogged about :)  I finished A LOT of projects this year.  This will mostly outline the projects I completed, but I added in a few other main points. 

January:
In January the only project I made completely was the Stupendous Stitching wall hanging from the Craftsy class (my favorite class to date, and I've done a lot of them.)  I also made a jelly roll race quilt top.  The non-highlight of January was that I badly sprained my wrist.  That sucked.


Feburary
I managed to get a number of projects done this month: Pajama Pants for Kevin Headbands for Courtney,Embroidered Towel for Melissa, Butterfly Shirt for Me, Bib for Violet, and a Mug Rug for Swap

March
In March I finally finished the first twin quilt for Mom, made Vogue 1224 for me (love this dress!), and some snack baggies for Courtney.  The non-highlight of March was getting a retry (fail) on my bronze freeskate test.

April
The highlight of April was seeing my family, meeting my new niece and going on a cruise.  I also made a wine bottle bag and Vogue 1208 dress (which I was proud of at the time, and wore, but Kevin has since told me doesn't look good on me.)  I also completed a mini wholecloth quilt, my first micro quilting project- this would turn out to be the year of microquilting! 

May
In May I finished second twin size quilt for Mom, one of my favorite quilts ever, and quilted the colorful quilt I made for myself last year.  I also made a dress for Josefina and started a dresden plate quilt, which has since been abandoned.  I wonder where it is...

June
In June I started my shadow trapunto snowflake quilt.  I did all the prep work for each block andfinished snowflakes 1, 2, and 3.  This is also the month I took up rowing and the highlight: finally passed my bronze freeskate test!

July
In July I made a wallet, a rosin bag for Cole and snack bags for Kristen.  I also finished Snowflakes 4 and 5.

August
In August I finished the Jelly Roll Race quilt, did the project from the Painted Quilt class from Craftsy (love it), and finished Snowflake 6, 7, and 8. Kevin made me a spool stand which is one of my favorite sewing accessories (he says he made it in June.  I wonder why it took me so long to post).

September
This month I only finished Snowflake 9.  I started Snowflake 10...and then the snowflake quilt entered UFO territory.

October
October was a low project month because of an awesome project- we moved to a new house!!!  We had the shortest house hunt ever.  I emailed our realtor at the beginning of August that we were sort of kind of thinking about moving, and would he be willing to give us an idea of the market.  By Oct. 1 we were in the new house.  We are SO happy with it- six years in the old house we put together a wishlist of exactly what we were looking for, and as an added bonus, we have the greatest neighborhood.   In random updates, I also attended my first hockey game.


November:
This month I finished a pair of knitted socks (well, I haven't closed the toes yet, I should do that tonight to finish them before the new year.)  And made the project from Quick Strip Paper Piecing class on Craftsy.com- it is hanging in the entryway.  We also joined a gym and I am really enjoying the aerobics classes.

December:
The big news for December was that I switched jobs.  I am enjoying my new position and it seems like it will be a good fit.  I also did a number of projects, the Side Setting Table Runner, a fabric wreath (possibly my first pinterest craft?),Violet's stocking, fleece blankets for Violet, Rylee, Conor, Luke and Brody, and a pennant for Cole.  I finished snowflake 10 and 11, dyed my first fabric and

began Mario Quilt.


So entering the new year the projects I have in progress are the Mario Quilt, the Snowflake Quilt, and the Dresden Plate.  I have also done a few Craftsy classes that I haven't done the project yet (Jeans, Alterations, Thread Art) and would like to.

Overall, it was a good year!

Sunday, December 30, 2012

New Project- Mario Quilt

I missed the quilt-along, but I remember seeing the Super Mario quilt when it started.  Now that I've seen the final quilt, I decided Kevin needs a Mario quilt.  So during Fabric.com's 12 days of Christmas sale I ordered some fabric, and it was scheduled to get here the 21st- perfect, as I would have multiple days of uninterrupted quilting fun. 
Then we had a blizzard, so it was delayed.  It was scheduled to get here on the 24th.  I can handle that, still will have Christmas day to quilt.  Nope, at 8:15 pm an "emergency condition beyond the control of UPS" popped up on the tracking.  But get this- the UPS man had JUST delivered to a house on the corner.  I was pissed off, as there was no tipped over UPS truck, so I really want to know what the emergency was!

Needless to say, I didn't get to quilt Christmas.  The fabric came on the 26th while I was at work, and I got it prewashed and then ironed and starched, and yesterday I started on the quilt.

Kevin's favorite characters are Boo and Dry Bones, neither were in the quilt.  I found a Boo, but haven't been able to get Dry Bones as 18 x 18 (anyone talented want to draw him for me?)  I may put his on the back in a larger size.

Since he was only a few colors and would be easy to cut the squares for, Boo was up first.

Now that I decided it worked (but not as well as my practice piece...) I am cutting the almost 4,000 squares needed for the quilt (each block has 324 squares).  I have the star and mushroom pressed and ready to be sewn, I will probably sew them tonight.

The process.

Step 1: Mark grids on cheap interfacing (99 cents a yard, plus I had a 50% off coupon- way better than the $100 on wash-away the QAL call for, even though it does change the hand of the fabric a bit.)  This is what I spent the holiday doing.
Step 2: Lay out all the squares and press.  (This Boo is 27" x 27")  Make sure to use release paper or a press cloth, as there is a lot of fusible interfacing that may still be exposed.  I also got out my older iron.
Step 3: Sew seams in one direction
Step 4: Cut open seams (well worth it to press seams open instead of to the side, this is going to be a 'B' to quilt.) and press, again, use release paper.

Step 5: Join top and bottom piece together.  (Up to this point, I was working with a group of 13 rows and a group of 5 rows-  18 rows won't fit on the interfacing.)  This is the only step I used pins for.


This will give you a big squished Boo.

Step 5: Sew seams in other direction.

Step 6: Cut open seams (This time I tried with a rotary cutter, much easier to cut, but the smaller seam allowance made it harder to press, I won't do this again.) 

 Block Finished (see opening photo).  It measures 18.25 x 18.5- so  I wasn't perfect.  If you look closesly not everything is square, but for my piecing, I have to say, this is pretty darn good.  And quick.  I can't imagine doing these individually, and even doing them a clumps of color I would have never been this accurate.  Can't wait to see more characters come to life!

Here is what he looks like from the back.  See- lots and lots of seams, and because of the interfacing quilting this is not going to be easy!